
A New Year! A fresh start, and time for some new challenges! This year I plan to create sewing patterns that are slightly more technically challenging. Why? Well I’m not really one for stagnating, I like to push myself to learn more and do more, growing my skills and knowledge, and growing more every year in my abilities.

I may have been sewing my whole life, and 2017 marks 14 years since I complete my studies and have been making a career out of it, but I never believe that I know it all, I always believe that I can learn more and become a better seamstress, dressmaker and business woman.
This week’s sewing tutorial is for a slit pocket, and it’s one of those things that I worked on creating a better version of (and will probably continue to do so), so that its process of construction is as simple as possible, but with the neatest, best quality version of it. So give our tutorial a try and let us know what you think of it.
Make It Sew!
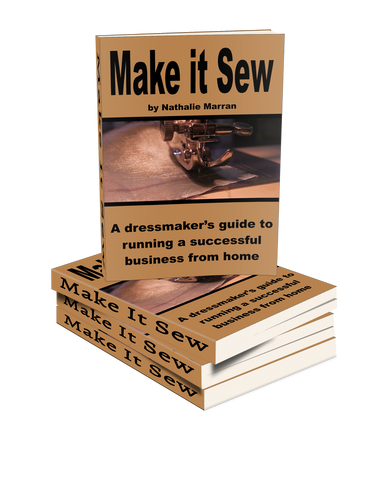
We are so proud that out book Make it Sew, by Nathalie Marran made it onto the Amazon best reads blog! To celebrate, everyone who purchases a full year’s Annual Sewing Patterns Subscription during the month of January, will receive a FREE copy of our most popular eBook – what a brilliant way to improve your skills and grow your own Sew From Home Business

Merri Ladies Blouse Sewing Pattern

If you have signed up for our newsletter or our annual sewing pattern subscription, this is the sewing pattern you will be receiving this Friday for FREE!
Tutorial of the week
The Slit Pocket

The slit pocket, once you can master it, then you will love it. A recent query from a client inspired me to create this week’s blog tutorial based on this pocket, and you can also use this tutorial to add this kind of pocket to a finished garment.
This is quite a challenging pocket for most, and one that does take a lot of practice. Although in my patterns I share the general way of creating these pockets, I myself have recently been working on trying to create a simpler way of constructing them, which moving forward will be included in new pattern instructions.
What you will need:
- Iron on interfacing - specifically for these pockets, I like to use the one that almost feels like cardboard it’s so hard
- Fabric for your piping
- Fabric for your pocket sections
I have included a few pattern piece for you to download
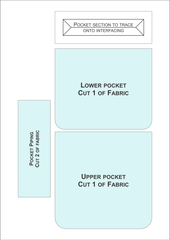
Step 1:
On a hard piece of iron-on interfacing measure out and draw your pocket section. Cut it out with at least a 1cm / 3/8” border around it, and iron onto the wrong side of the fabric, in the space where you intend to attach your pocket.

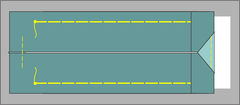
Step 2:
Cut along the lines in the pocket are, and press them open towards the wrong side of the fabric.

Step 3:
Press your two piping sections in half, and pin them to the long sections of your pocket, with the fold facing inwards towards the pocket opening. Baste into position.

Step 4:
Baste your triangular corners to your piping section, this should help your corners as well as your piping sections stay in place, while you complete your pocket. Press flat again before continuing (this will help with the neatness of your pocket.
Step 5:
Attach your pockets sections to the long opening sections, stitching along the folded lines.

Step 6:
Attach the picket sections together, by sewing down the sides and bottom, making sure you include the sides of the piping sections, but don’t stitch to the main fabric section. Press flat – your pocket is now ready!
Attach the picket sections together, by sewing down the sides and bottom, making sure you include the sides of the piping sections, but don’t stitch to the main fabric section. Press flat – your pocket is now ready!

Tip: Tailors usually use an invisible hand stitch to sew the piping sections closed- this helps to keep the pocket in shape until the client purchases the garment.
No comments:
Post a Comment